Sculpting
- BL
How to sculpt miniature dragon wings
Wings are expensive, but you want them. So how do you get them for less money?
3D wings (bent wings)
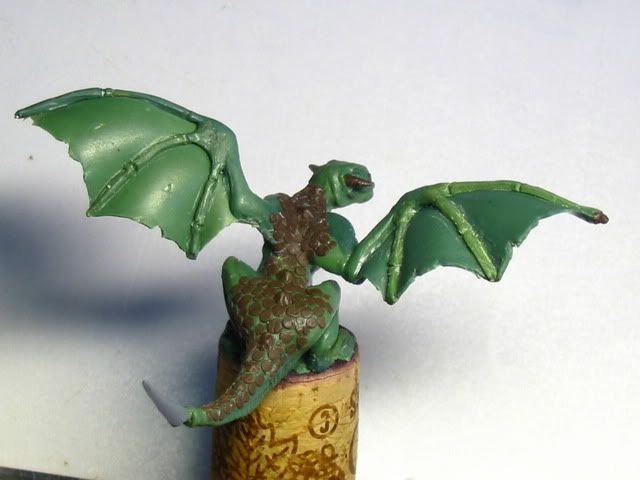
Green Stuff + wire, method A (3D)
Make a wing frame of wire
Sculpt with Green Stuff
- Example: http://thetyranidhive.proboards.com/thread/39416

- Example: http://midwestmonsterlab.blogspot.no/2012/02/hades-vampire-lord-wip-and-green-stuff.html

- Example: http://www.miniwargaming.com/content/baby-orc-wyvern-sculpt
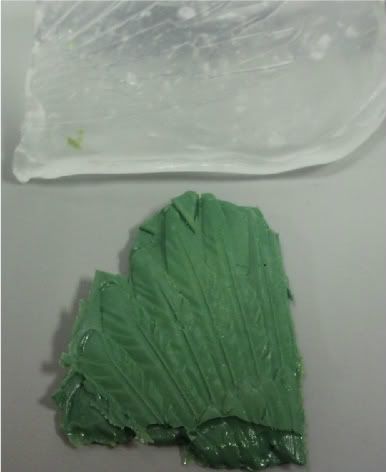
Green Stuff + wire, method B (3D)
Apply Green Stuff to a baking sheet
Thin it and smooth it out
Let the Green Stuff harden for 40 minutes
Make a wing frame of wire
Apply wing frame to Green Stuff
Put on latex gloves
Fasten the wire and shape the Green Stuff with your fingers
Let harden fully
Example: http://mandragoreminiatures.free.fr/tutoailedragonanglais.pdf
Green Stuff + Instant Mold + existing wing (3D)
Use Instant Mold to make a 2-part mold of an existing wing
Put Green Stuff between the finishes mold parts, press together and apply pressure for x hours.
- Example: http://www.ulthuan.net/forum/viewtopic.php?f=5&t=37972&start=30
Green Stuff + Liquid Blu-Stuff + Magic Sculpt + existing wing (3D)
Use Liquid Blu-Stuff to make a 2-part mold of an existing wing
Mix Green Stuff and Magic Sculpt about 1-1. The result will be softer than pure Green Stuff.
Put the mix between the finishes mold parts, press together and apply pressure for 8-12 hours.
Example: http://masteroftheforge.com/2012/05/21/rubber-molds-green-stuff/
Super Sculpey + wire (3D)
- Make a wing frame of wire
- Sculpt with Super Sculpey
Bake or use heat gun
- Example: http://www.coolminiornot.com/forums/showthread.php?50236
Super Sculpey + wire + Polymorph (3D)
Make wing frame with wire
- Apply Polymorph to fasten pieces
- Sculpt with Super Sculpey
- Bake or use heat gun
Example: http://fowlplayfilm.weebly.com/puppet-construction.html

Super Sculpey + wire mesh + wire (3D)
Make a wing frame from wire
Apply wire mesh for wing leather
Fill and cover with Super Sculpey
- Bake or use heat gun
- Example: https://www.skillshare.com/classes/design/Sculpting-Creatures-and-Critters-Bringing-Your-Ideas-to-Life-in-Clay/491727686/project-guide
Liquid Super Sculpey + aluminium foil + wire (3D)
Make a wign frame of wire
Crunch and apply aluminium to one side of wings
Add Liquid Super Sculpey on aluminium
Bake or use heat gun
Remove aluminium foil
Example: http://madsculptor.blogspot.no/2011/08/elphaba-day-2-bat-wings-and-clay.html

Toy bat + epoxy (3D)
Buy a halloween toy bat
Cut the wings off
Fasten to miniature with epoxy
Example: https://rpgobsessed.wordpress.com/2011/07/07/minis-everywhere/
Example: https://rpgobsessed.wordpress.com/2011/11/08/gold-dragon/

Worbla + Milliput (3D)
Draw wing on worbla board and cut it out
Use heat gun to shape
Sculpt with Milliput
Example: http://atomicladies.com/how-to-make-a-judge-death-pterosaur-shoulder-piece/

2D wings (flat wings)
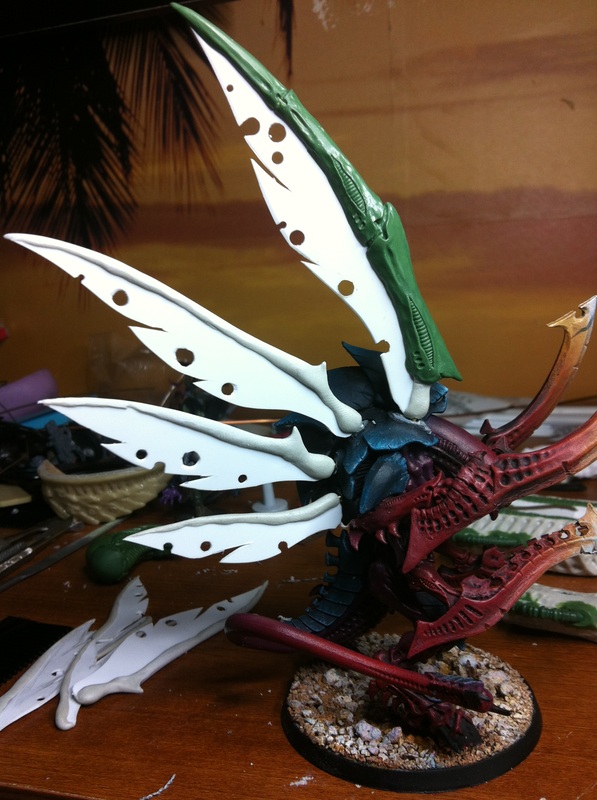
Green Stuff + polysterene + thick paper (Flat)
Cut wing skeleton from polysterene
- Fasten parts with Green Stuff
- Cut wing leather from thick paper
- Fasten and cover with Green Stuff
Example: http://warfrog.blogspot.no/2011/10/custom-hive-tyrant-wings-pt-2.html

Green Stuff + plasticard (Flat)
Cut wing skeleton from plasticard
- Fasten parts with Green Stuff
- Cut wing leather from plasticard
- Fasten with Green Stuff
- Shape with Green Stuff
Example: http://thetyranidhive.proboards.com/thread/43502/aleinoid-insect-wings?page=1
Example: http://www.chromeminis.com/Navigering/Main%20site/gallery.htm
Fimo Liquid Decorating Gel + Premade mold (Flat)
Get a polymer clay mold of desired wings
Add mold release
Pour Fimo Liquid Decorating Gel
Smooth out surfaces
Bake or user heat gun
Rinse and repeat for opposite side of each wing
Glue together
Example: http://www.ebay.com/itm/OOAK-Fairy-Faery-wings-Mermaid-Tails-By-Faith-Tillbrook-prfag-/221147467398

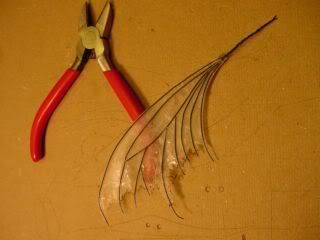
Fimo Liquid Decorating Gel + wire (Flat)
Make a wing frame of wire
- Lay down on heat-resistant glass
- Apply Fimo Liquid Decorating Gel
- Use a brush to shape the gel
- Bake or use heat gun
Example: http://www.aprylian.com/tutes.html
Example: http://www.ladyoftheonering.com/fairywingtutorial.htm
Paper Clay (Flat)
Sculpt a wing on baking paper, using Paper Clay
Fabric + wire (Flat)
Make a wing frame of wire
- Apply fabric
- Put between two sheets of wax paper
- Let dry for ~6 hours
- Cut off excessive fabric
- Example: http://www.thefairiesnest.com/2009/01/wing-tutorial-at-last.html

Cellophane + wire (Flat)
- Make a wing frame og wire
- Glue to cellophane
- Cut off excess cellophane
Example: http://www.diyduet.com/2014/06/fairy-wing-earrings.html


Undertemaer:
Mentions:
Filter by label
There are no items with the selected labels at this time.
Indirekte relaterte sider:
Filter by label
There are no items with the selected labels at this time.
Related content
test footer